Pages

Showing posts with label simonsaysstamp. Show all posts

Sunday, September 13, 2015

NBUS #5

Hi Friends,

Today's card is made specially for Darnell's  NBUS (Never before used schtuff) Challange # 5.


 She is the sweetest crafter I have ever known and a gem of a person. I love to read her posts. So here is to you Darnell.


My NBUS is that bricks embossing folder by spellbinder. I don't even remember when I bought it. Bulb die is by MFT, word die is by PTI and stitched rectangle is by SSS. I inked the embossing folder lightly before running through Big Shot to define the grout.

Hope you will like my card. Hugs.


Monday, June 15, 2015

Ombre - Virginia's View Challenge

Hi Friend ,

It's been a while since I played along Virginia's challenge. But I made this card for me DT post On Crafters Corner Blog  and thought this will go perfectly with on going challenge. The theme is monochromatic/ ombre.


My take on this is 


I have used Hero Arts - Twid Pattern Background stamp for the frame. And this very old hero art stamp. This set is very close to my heart as it was gifted by a very good friend , years back!


All the inks are by Mama Elephant. As Laura says they blend like butter. I just love these inks. I used Simon Says Stamps stitched rectangle die and sentiment.

Hope you are playing along this fun challenge too.

Love 


Friday, May 15, 2015

Simon Says - workout

Hello friends,

Sharing 2 cards today. Both are from same stamp set - sss - workout. Sometime back i got my first ever lot of copic. I am still learning but these girls were perfect for copic so went ahead and did it. Let me know how you find them. 


For the first card, I have used Tim Holtz stencil for background & for the card below sss stencil and Tim Holtz stencil.


Both the girls are colored with copic. I did not note the colors as wasn't sure about it. It was part of trial. But next time onwards, I hope I will do more systematically. 

Hope you will like it. Don't forget to leave a comment....Hugs!


Wednesday, March 25, 2015

For HIM

Hello friends,

How are you all? I am super duper busy now a days. I have so many cards to share but not getting enough time to write posts. Today, I am sharing two masculine cards. I always struggle when I have to design a card for a man. But this Penny Black stamp and Lil' inker die helped me a lot....:)

The first one is my absolute favourite. Love its clean and sophisticated look.


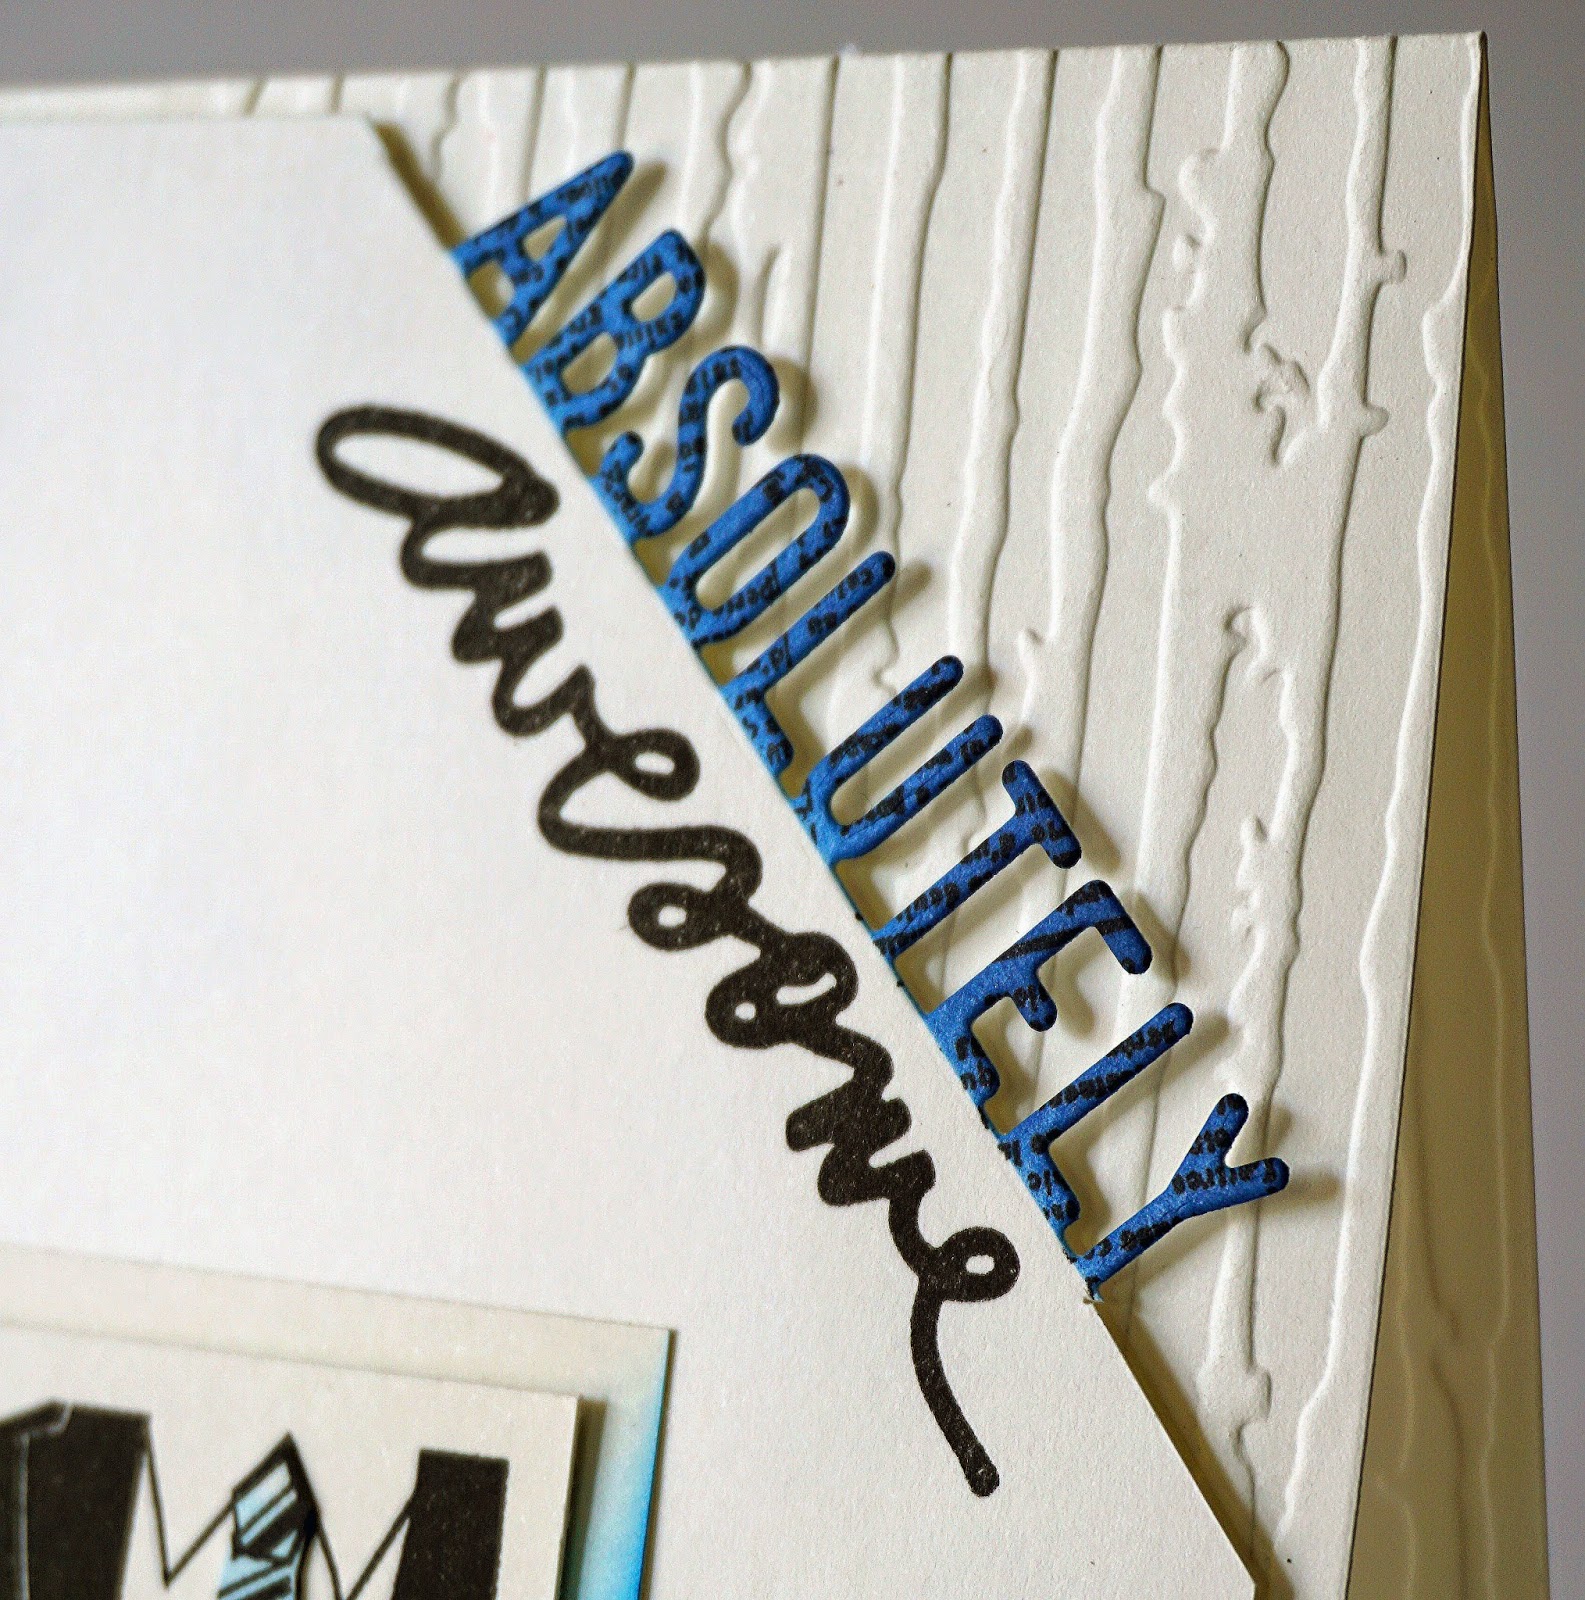
Focal image is penny black stamp. I shaded the matting and tie with distress inks . Text is heroarts stamp added with masking the panel with torn paper and shaded by distress inks. Corner of the panel is cut with sss die & stamped with text stamp & colored with same inks. I dry emboss the corner of the base & added the panel with foam tape. 


 a close up: 


The second card .


I just love that 'DAD' die by Lil Inkers. Build the whole card around it. Background stencil and stitched dies are from SSS. 


Hope you will like them. Hugs.


Friday, March 20, 2015

Jane's Doodles


Hello Friends! Today I am sharing a card I made using Jane's Doodles - Pretty Peonies stamp. Super cool stamp. I also used Laura's card  for inspiration.


I stamped those gorgeous flowers with versamark and embossed them with liquid platinum embossing powder. I use spun sugar, spiced marmalade and tattered rose distress inks for colouring those beauties. Split the panel with MFT - wave border die. Added PTI sentiment from the back. I also cut the bottom part of the panel with same die but at different angle and added two wavy border.
I stamped the base of the card with Clearly besotted stripe stamp in some grey ink. Last i added that 'wishing' die cut ( sss die) .

close up:


That is all for now.... keep crafting & sharing. Hugs!


Friday, March 13, 2015

Light up my life!

Hi friends,

It is a quick post. I made a card inspired by Taheerah's Cure For Monday Blues Challenge #46.
Yes, I just had to play along as those are my favourite colours and all the graphic elements from inspiration picture were calling me....:)

Inspiration photo.


Isn't that gorgeous? So many possibilities...!


My take on it:


I was inspired by colors and that light bulb in the corner.
I first stamped black stripes with clearly besotted -  Basic Stripes. Cut a grey card stock with simon says stitched die and trimmed the bottom to an angle to give little attitude to it!. The bulb die is MFT inked with distress ink.  

Entering for the challenge.


Try to play along if you haven't done yet! 
Bye for now... see you soon!


Wednesday, February 4, 2015

Another shaker

Here it goes...

For this card, I created a panel with two colors of paper stripes. Made a window for shaker element with PTI speech bubble die. I stamped the inside of cutout with WPLUS9 stamp. Added some locally found bling & mounted the panel with foam tape. I also added 2 more speech bubble, one from pattern paper with studio calico wood veneer heart( colored and covered with glossy accent) and another with sentiment from simon says stamp.

Close up:


"Just Us Girls" - JUGS#278-Wild Card Week


Hope you will like it. I will be back soon with some more valentine cards. Hugs.


Saturday, January 10, 2015

You Bring Me Joy

Hi there,

Today, I am here with a white on white card which is one of the technique for Virginia's View Challenge #1 too. She said white doesn't mean boring...! So I tried to add as much interest as
possible...:).


I had so much fun creating this card. Love how it tells a little story...when you are in love and you are together, happiness blooms hence branch with leaves in last frame where two birds are together and bare branches where both birds are lonely. 


  I have used Simonsays-Stitched Rectangle &  Spellbinder square dies for frames. Branches and birds are memory box & IO dies. A touch of wink of stella on birds in last frame.

Entering this for


Thursday, January 8, 2015

Spectacular 2015!

Hi friends,

Happy New year! It feels like forever since my last post. I got so busy with friends and get-togethers. Apart from that I am working on a tall order of  wedding invites so time is just flying.

Today, I am sharing a card (with tutorial) which showcase masking - to give dimension & depth in a single layer card.


 I bought this mft stamp because I love those sentiments. But the images of spectacles are too small (as my cards are 5" x 7") to use it as focal point. So I used this stamp from Hot Off the Press too.


1. On the card base, position the round die & stamp to decide how you want to lay them.


2. Take a copy paper as big as your card front. Draw a circle with the help of die at desired position.    Tear the paper by hand to cut out the circle.( you can cut it with die too but i love that deckle edge)


3. Use the negative to mask the base and stamp those spectacles with two different shades of grey.


4. Remove the negative mask. Cover the stamped area with cut-out circle - positive mask and apply chalk over the edges to define it. This will give an instant pop &  dimension to the stamped portion.


5. Stamp the bigger image in black & add sentiment.
6. I wanted to add something on the bottom. I decided to use Simonsays this stamp as it has similar fonts as mft. Mask the bottom with torn paper & stamp few words. Apply chalk.


7. I made another card too. In this I made a mask of big spectacle by stamping and fussy cutting from copy paper. Lay that mask under the negative circle mask before stamping. This will push focal point in front giving  more depth to the background.


Hope you enjoyed reading it and will give it a try.


I am entering this card for :


Tuesday, December 9, 2014

Christmas Magic

Hi friends,

I love making Christmas cards. The main reason is the whole spirit of the holidays and other reason is so many supplies are available and blogs are flooded with inspirations. So, I got into the mood and made mine.

 For this card, I created the background with distress inks and stamped those trees with black soot distress ink so that it will bleed a little and will give that little softer look. The die is cityscape die by Memory box. I distressed the edges of die cuts with distress inks & apply little bit of glitter mixed with glue with the help of brush. I stacked the die cuts and adhere on the back of the window panel. Sentiment is from papertrey ink. I added two stripes at the bottom to tie the whole look & foam mounted the panel on base card.


close up ...:)


Shakers cards are so in and i love this polaroid frame die by MFT to make shaker part. I cut three frames and stacked them to give depth for sequins to move around. I stamped and gold embossed the top most frame to mimic candy cane stripes. Poinsettia is coloured with distress inks.   


For this card, I used SSS Kate Snowflake. I covered them with 2 layers for silver, gold & white (with glitter) embossing powder. Background is made with Tim Holtz stencil, Distress inks & PTI stamps.


I am playing along with Virginia's view challenge #10.


Have a great time creating your Christmas Magic. Have fun.