Pages

Showing posts with label pennyblack. Show all posts

Monday, May 25, 2015

Mimi - Penny Black

Hi Friends,


Today, i made some cards using  Big wish  stamp set by Penny Black. These Mimis  are so so cute and really good if you enjoy coloring. It is easy for fussy cutting too.


-As you can see, the balloon is attached to the girl. But I cut the stamp  and  separated balloon. Now, stamp the Mimi on a piece of  white card, color and fussy cut. Lay it on card base and mark the spot behind her palm which is holding the string.


- Stamp the cut balloon multiple times using mask. Color all of them and  hand draw strings so that they will meet at the marked spot. Pop the Mimi on foam tape in such a way that her palm will align on the marked spot and it will look like she is holding all the balloons.


All the images in the set are birthday themed but I decided to use them for a card other than birthday.  For that I had to get rid of those party hats. I used sticky part of post it notes to make masks. 


I  hand drew the top of her head (masked area) before coloring. 

Next is a shaker card


I tried faux embossing with die cut for next one.


That's it for now. See you soon...keep crafting and be happy!


Wednesday, April 15, 2015

Using stamp & stencil duo

Hello Friends,

This is my first post as a Crafter's Corner DT and I am super excited to be here. 
For next few posts I will be working with Penny Black brand of products. These products are of very superior quality. Their design team is very talented too. By following them I have learnt a lot. My cards are heavily inspired by Jill Foster's work. The way she uses products and water colours is just amazing. 

They have this combo of stamp and stencil which i love the most... and why? Well, you will see as we proceed. I am focussing mainly on cling stamp Demure & stencil Floral Spray.


Today, I have five cards and a tag made with same stamps and stencil. I tried to use then in a few different ways to create different looks.  Hope you will like them. Remember , mostly my cards are 5"x7" -this will give you better understanding of stamp and stencil size.


First Card : Made with stencil & stamp 


Many of their cling stamps come with co-coordinating stencils and they are really big and can be used for mixed media too. For this card, I have used memento dye inks for coloring flowers while background is made with distress inks. 

Process :
 

1. Stamp the image with memento black ink on a panel.
2. Lay the coordinating stencil and secure it with washi tape. this will mask the background and you       can colour the flowers without worrying about going out of the line. Isn't that cool?


3. Start applying lightest color of dye ink first with dauber and continue adding darker shades till you      are happy.
4. Add little detail in the corners with another stencil and dye ink.
5. Colour the background with different distress inks. As we have used dye inks(which are permanent     once dry) for flowers it will not bleed into wet background. This makes water coloring so much           easier. Add some more texture with a script stamp once the background is dry.
  

6. To add more interest I used the same stencil & script stamp in the corners of card base too. Mount the panel with 3d foam tape and finish it off with sentiment and few blings.

Card 2: Made with only stencil

For this card I have used Penny Black pattern paper Painted Blooms as a base for stenciling. I am not a huge fan of pattern paper but i specially like this one as the prints are small and many of them are geometric. Floral or big patterns always confuse me...;). I took inspiration from  Jennifer's video for stencilling. 


1. Place stencil on a pattern paper, secure it and blend in Colorbox Frost White  pigment ink with a foam applicator( The best white ink i have used so far). Heat set it.( remember, pigment inks take longer to dry).
2. Place the stencil back on the white flowers and shift it little bit to offset the next layer. Now apply any dye ink with a duaber. This will give beautiful shadow where there is only dye ink. It will blend with white pigment ink and give pastel shading where there is pigment ink.

3. cut a window from a white panel and emboss it using embossing folder. Emboss sentiment on a strip of vellum with copper embossing powder and adhere it on the back of embossed frame. Mount the whole thing on stenciled pattern paper with 3d foam tape. This will give a nice shadow-box kind of effect. Add thin frame of brown cs around window and stick whole thing on card base.  


Card 3: Made with stamp and stencil


I stamped the flowers with versafine black ink and clear emboss it. This will raise the outlines making it easier to colour flowers and prevent bleeding. With a broad bush add thin down blacksoot distress ink on all over the panel and as you go use paper towel to lift off color from flowers. Let it dry. 


I have used koi water colors to colour flowers(coming soon to Crafters Corner). They are very creamy and packed with pigments. 


Create masks by stamping same flowers on copy paper & fussy cutting them. Now, lay the masks on water colored flowers and stamp hero arts news print stamp in soft granite ink. Repeat stamping till the panel is covered. 


Lay the stencil on flowers. Now comes the best part.....:) Stamp any small images or texture through the stencil on flowers. This will give lots of texture and give illusion of layers in a single layer card. I applied little bit of gesso with my finger hear and there. I tore a corner of the panel and mounted on base card and added a sentiment along with silver loose thread. Oh, ya...corner of base is stamped with same flowers and embossed with white powder.

Card 4 : (a2 size card) Made with stamp & stencil.


I have tried no line colouring here. Stamp the image in tea dye distress ink. Add shading with various distress inks.

I have used worn lipstick, picked raspberry and fired bricks inks here. Once it is dry, use stencil to add details and color for branches. Card base is stamped with background stamp in versafine black. Mount the panel with little border of gold foil paper matting. Add a loop of ribbon and enamel dot to finish it off.

Card 5 : Made with only Stamp.


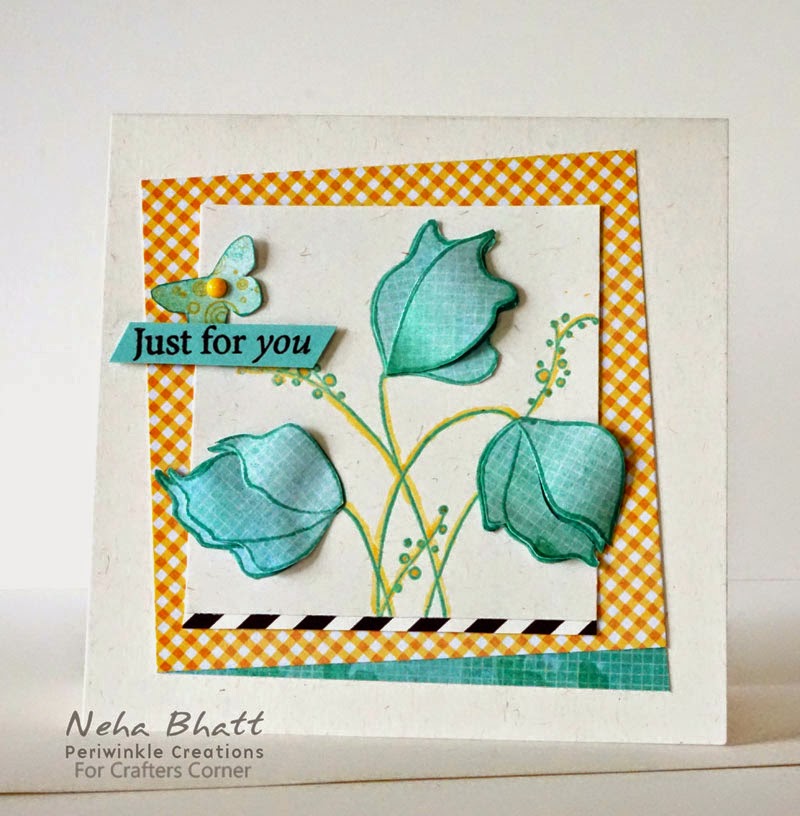
There is lots of stamping and fussy cutting goes in this one. I have used two pattern paper from the pack- one for matting and other for flowers. That greenish blue paper has tiny grids and few butterflies on the side. I fussy cut one of them to embellish the card. 


1. Stamp part of the stamp on a square piece of white cs with colorbox ink - celadon.  Stamp each flower twice(with same ink) on pp and clear emboss them. Fussy cut all the flowers.

 2. Stick one set of flowers on stamped white panel. Check that the panel is little smaller than the image so the two flowers will hang outside the edge which will help to give it some dimension. Now fussy cut the petals form the second set of flowers as shown in the picture above. Curl them by rolling them on paintbrush and adhere them with a dab of glue at the base of petal. You have your popped flowers ready.  See the side view...


Tag : 


I went little crazy with this one. I stamped the background with Mama Elephant Trifecta stamp. Two flowers were stamped with memento black ink. I colored all the triangles within flower's out line  with different colors of markers. I just love that kind of pixilated look it gives.  

Hope you will like it! And if you do....leave comment below!


Wednesday, March 25, 2015

For HIM

Hello friends,

How are you all? I am super duper busy now a days. I have so many cards to share but not getting enough time to write posts. Today, I am sharing two masculine cards. I always struggle when I have to design a card for a man. But this Penny Black stamp and Lil' inker die helped me a lot....:)

The first one is my absolute favourite. Love its clean and sophisticated look.


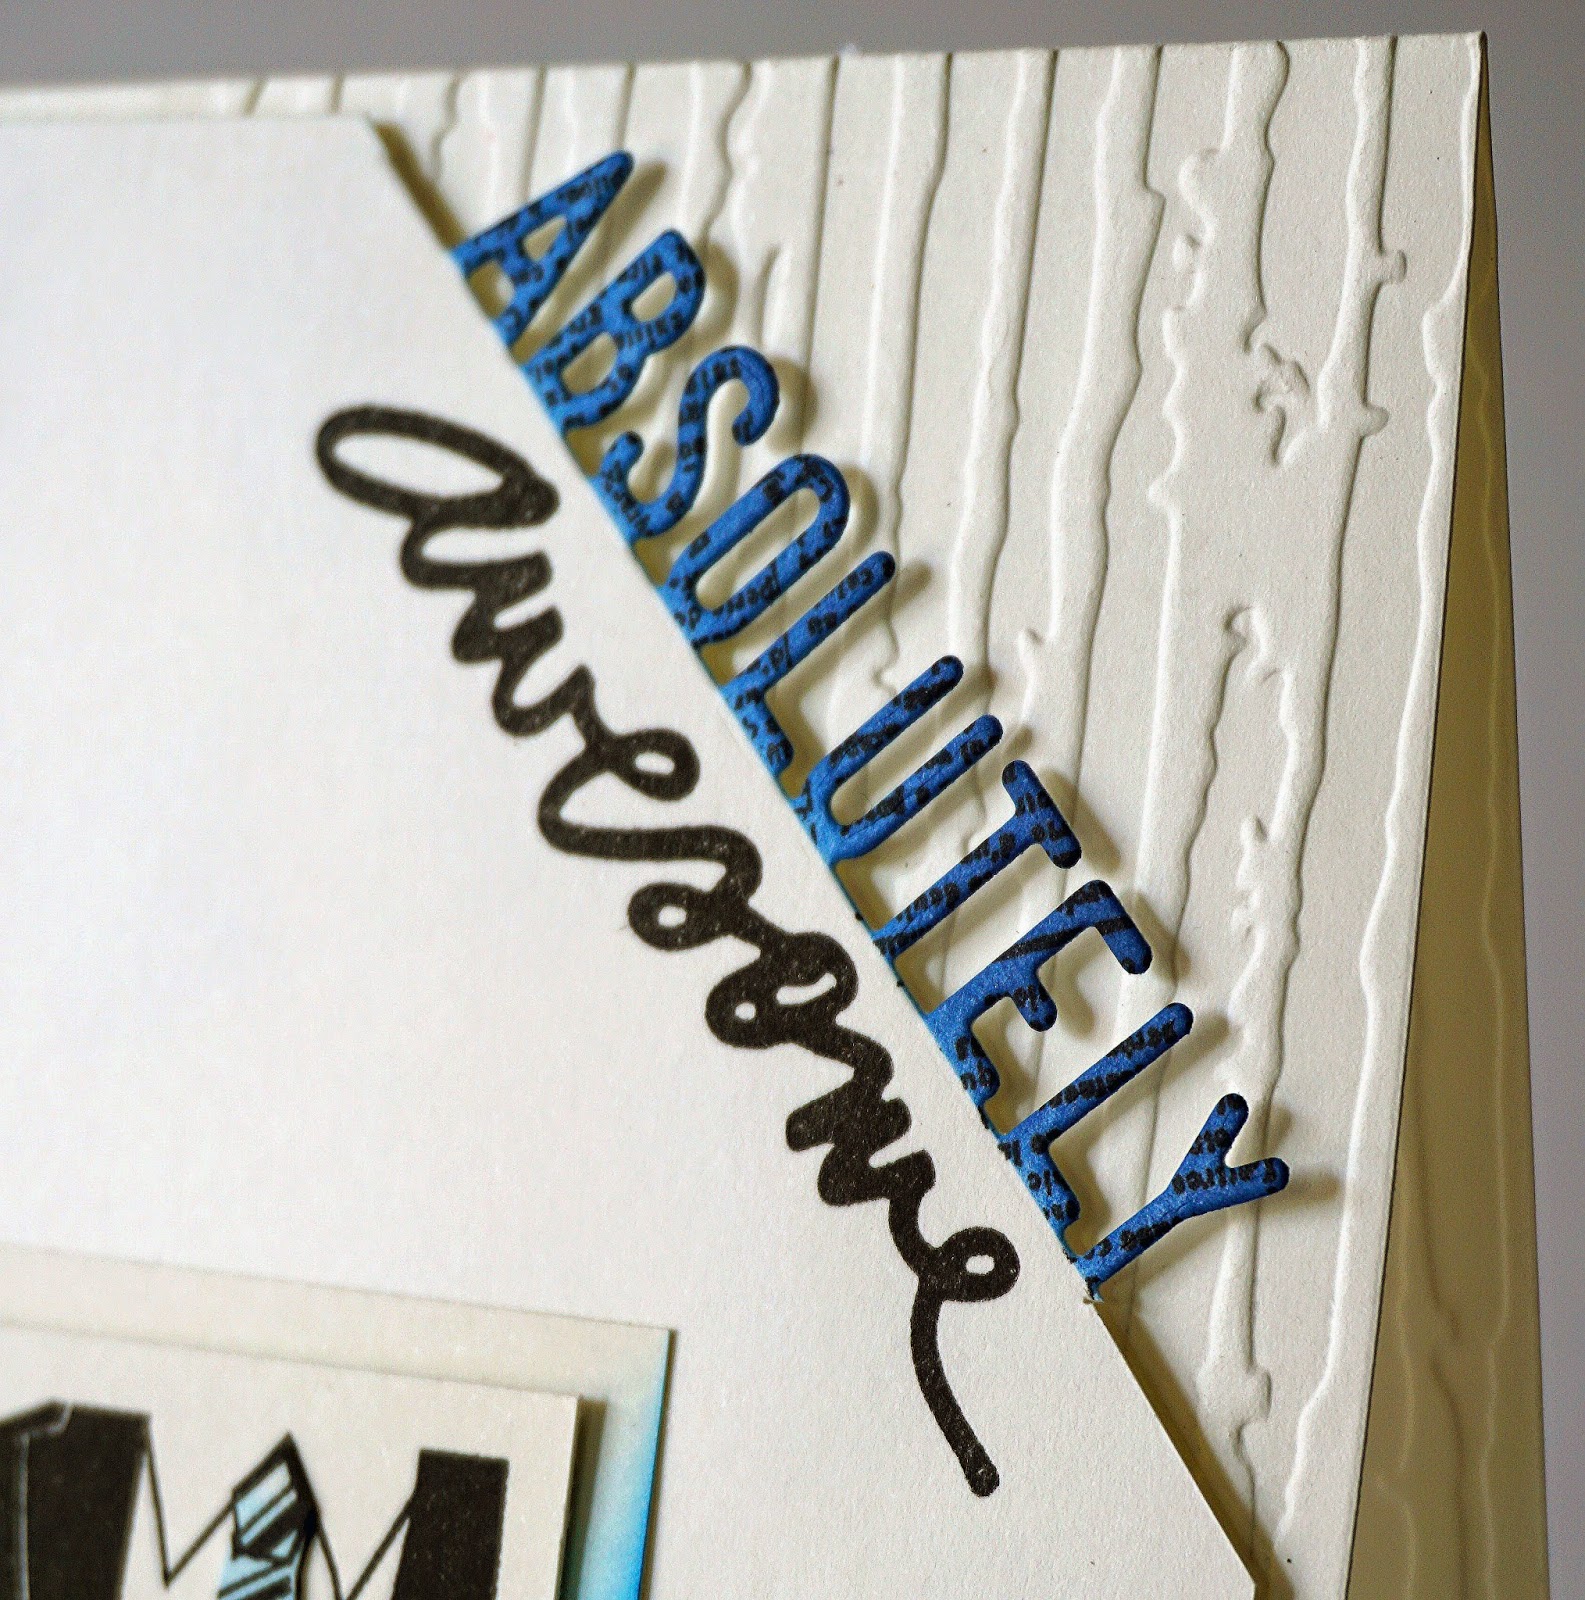
Focal image is penny black stamp. I shaded the matting and tie with distress inks . Text is heroarts stamp added with masking the panel with torn paper and shaded by distress inks. Corner of the panel is cut with sss die & stamped with text stamp & colored with same inks. I dry emboss the corner of the base & added the panel with foam tape. 


 a close up: 


The second card .


I just love that 'DAD' die by Lil Inkers. Build the whole card around it. Background stencil and stitched dies are from SSS. 


Hope you will like them. Hugs.


Wednesday, November 19, 2014

Softly - Penny Black

Hey there,

Today, I am sharing three cards made with one stamp - Softly from Penny Black. I just love this slap stick stamp. It is oversized and you can stamp multiple times depending on how dense or scattered you want your branches.

 I have used just one technique for all the cards i.e. making background with distress inks, stamped and embossed the image and add more colours to flowers and leaves to make them stand out.


For first card, I have used Simonsays -Khaki  ink to  stamp the images multiple times & coloured it with distress inks. I just love the soft feel of this card.Sentiment is PTI.


For the second one, I created background with various distress inks, did partial stamping & embossed with silver embossing powder & coloured it with same shades of inks as background to get that tone on tone effect. Sentiment is from PTI.


For the last card, I just swoosh down (is that right word...?)  the distress ink pad from the top of a white CS  creating that amazing textured background. I stamped and embossed in white & coloured with Tombow markers. Sentiment is again  PTI.

Hope you will enjoy them as much as I enjoyed making them...:)!
Bye for now ..... keep crafting!