Pages

Showing posts with label periwinklecreations. Show all posts

Thursday, June 30, 2022

Jane's Doodles blog hop June' 22

 Hello Friends,

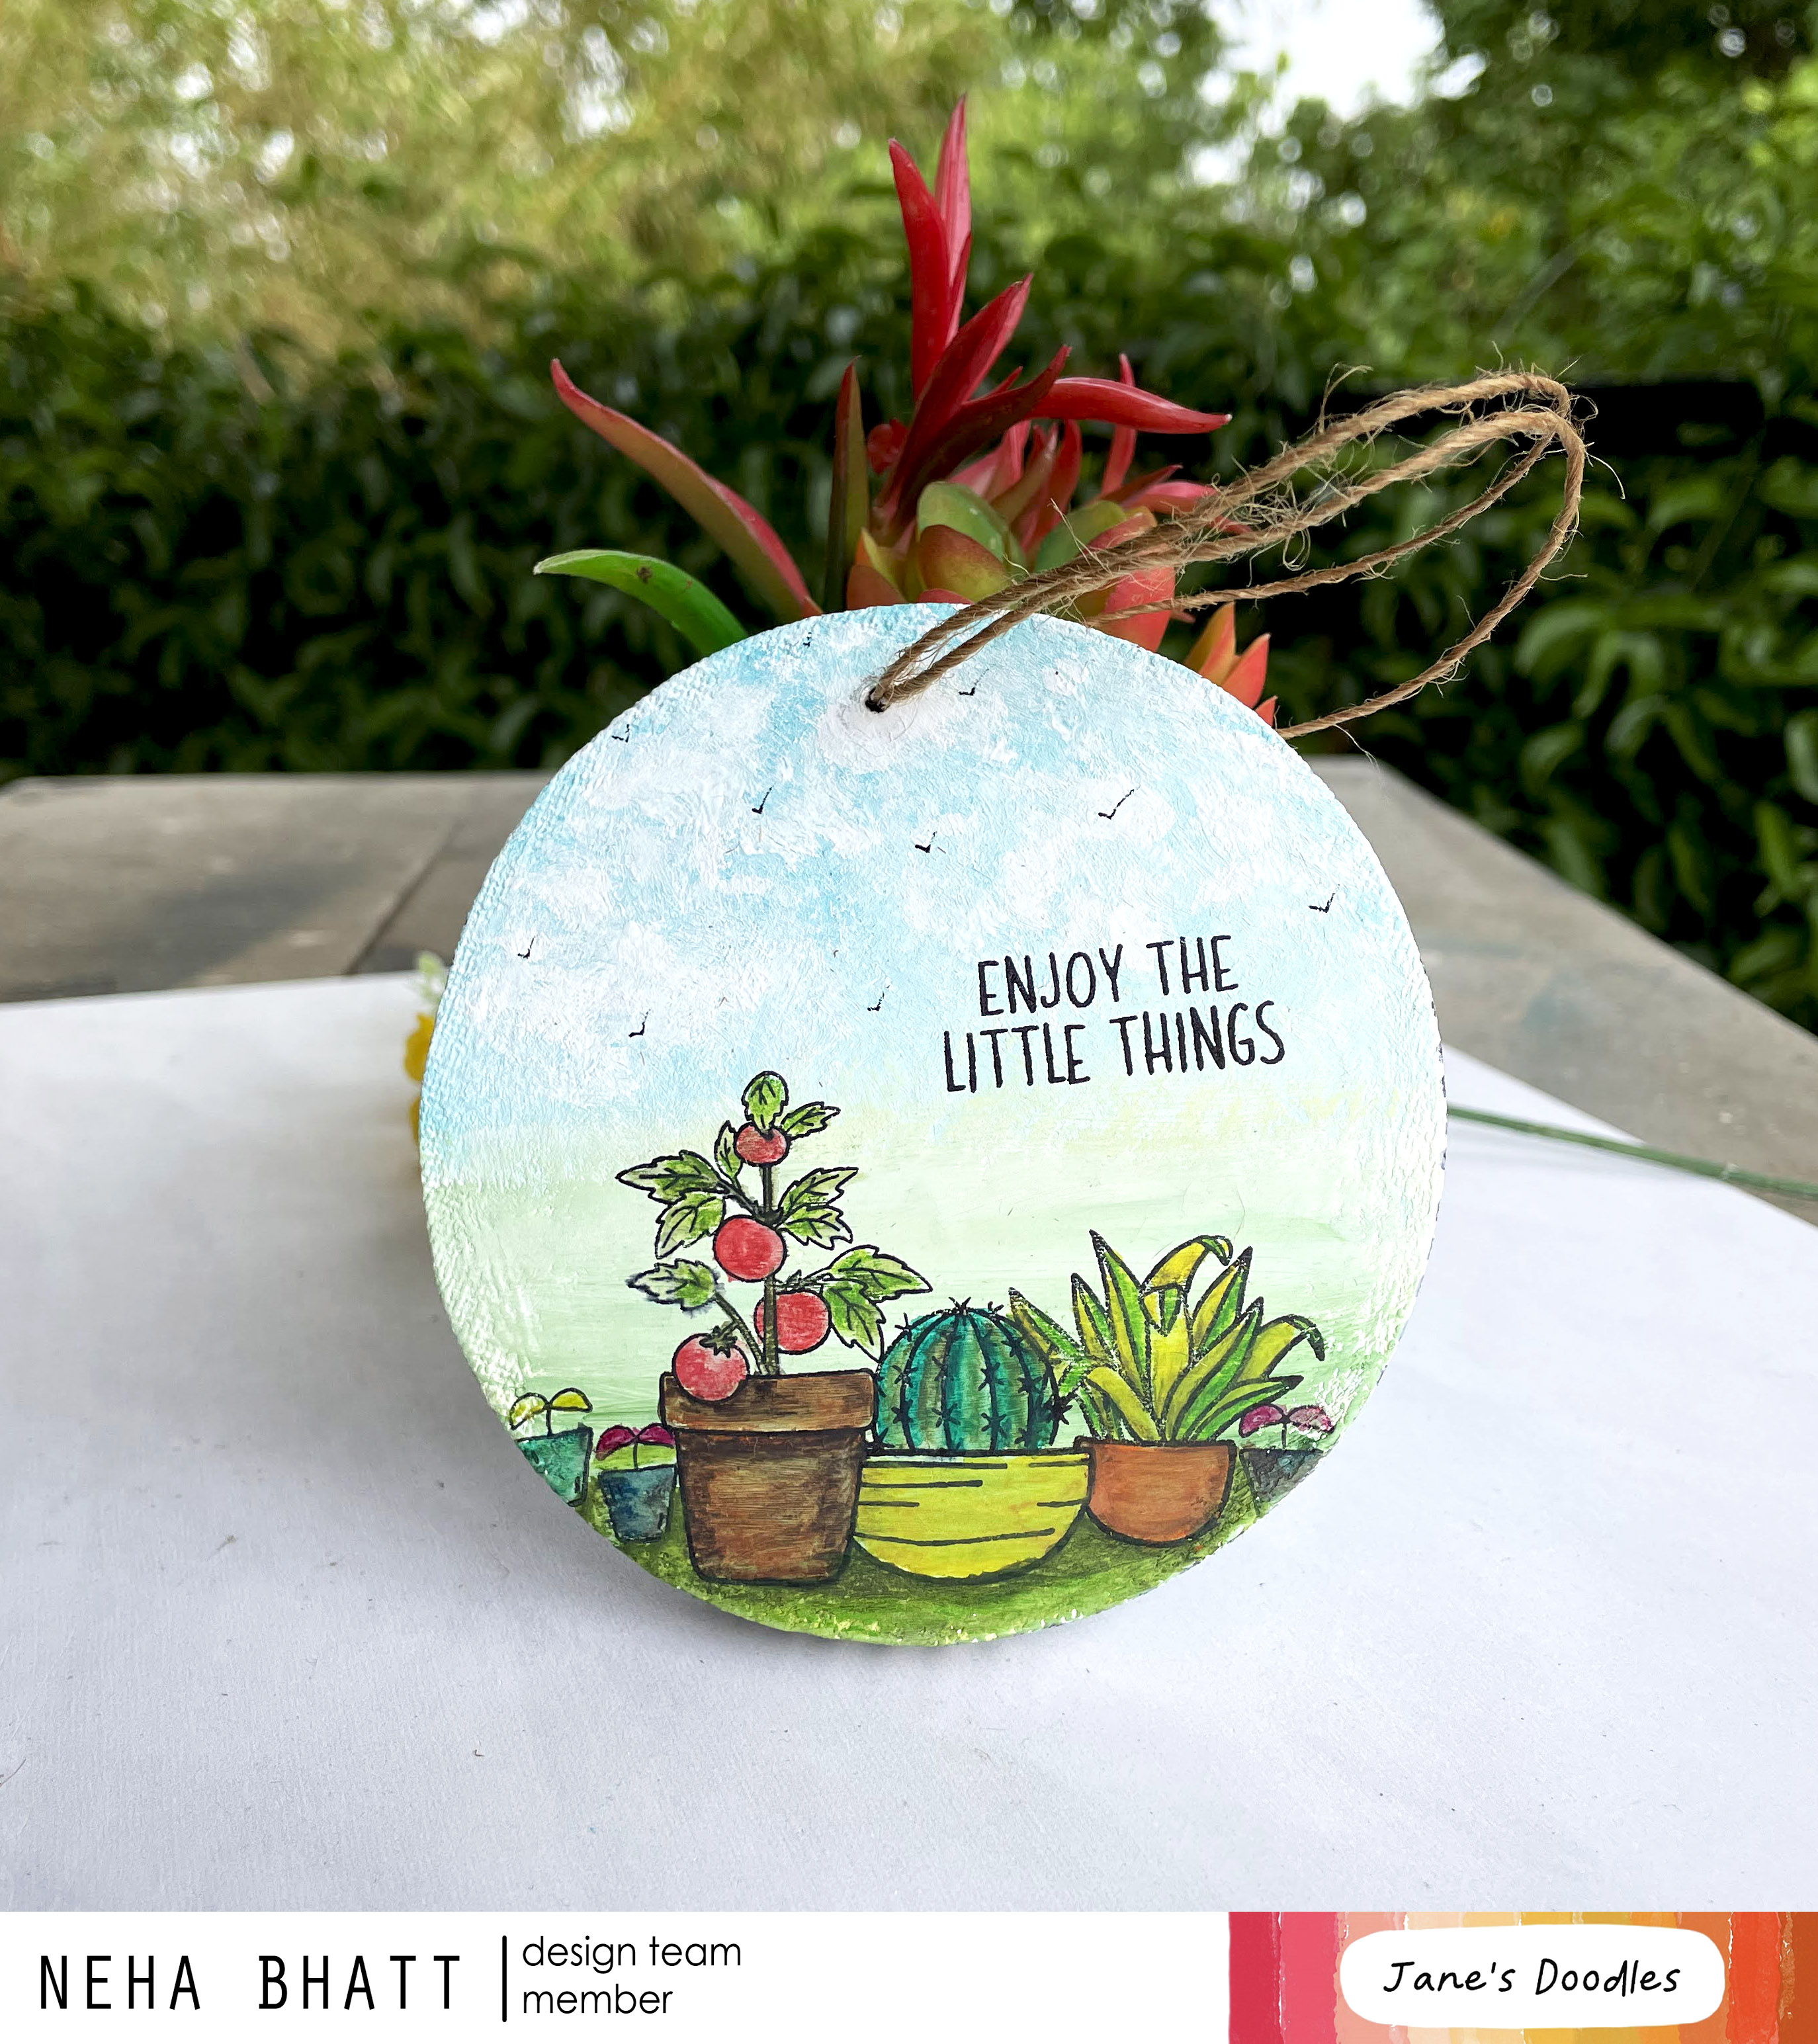
New stamp sets, In the garden and I dig you,  at Jane's doodles is all about gardening. I am a hardcore gardener. I have a huge garden space. Mostly they are decorative plants, medicinal trees and few fruit trees. Lately I have started growing vegetables too so I can relate to these sets very well.


I have used In the garden set for both the projects.


Yes, they are not cards...:) 
First one is a plaque painted on a wood slice. I, first painted the slice with 2 coats of jesso and 2 coats of white chalk paint. This helps in sealing and smoothing out the  surface as well which allows better stamping. I stamped the image with archival ink and colored it using inktense water color pencils which are permeant after drying. The big leaves in the sides is stamped with memento luxe pigment ink for permanency!  


Second one is a small canvas mounted on a wooden base. It was easy to work on this one because the surface is even.


Here also i used archival ink for stamping and inktense pencils for coloring. sky is done with acrylic paints. 

I love when I can use my card making supply for diy home décor. 

I hope you like the way i used the stamps. Trick is selecting proper stamping ink and coloring medium. 

Let's start hopping to see what other designers have made. Leave comment on each stop to enter to win a stamp set/die or stencil  of your choice. 

There is also 35% off through Sunday!(no code needed)

Order of the hop
Neha ---  YOU are here 

That is all for today! Thank you for being here!


Friday, January 22, 2021

Jane's Doodles blog hop

 Hello friends,

We are having a blog hop for the two sets sweater weather and weird released recently at @jane'sdoodles . I am using digital version of weird set , today!


It is a beautiful set with 3 sloths and  some amazing sentiments.  I printed the images, colored with copics and fussy cut them out. I used a piece of acetate, some distress inks and water to create the background .


Please visit all the designers' blogs for inspiration and leave some love on each post to enter to win a stamp set of your choice. Winner will be announced on Monday! so happy hoping!

There is 30% off on all clear stamps during the hop  (Friday - Sunday).


Blog Hop Order

Kaja

Milka

Marion

Neha

Claudia

Bobbi

Laura (guest)

JD blog (Katerina's card)


I hope you are inspired to try these sets! 

Thank you for being here!


Tuesday, January 8, 2019

You fill my heart with Joy

Hello friends,

I am on Jane's Doodle blog with this colorful card. I have used 2 stamp sets to make this card.


Birds are from - Free as a bird stamp set and sentiment is from one of the retiring stamp set - Hello Friend (which is on the sale ) but it is so unique that I had to use it. 

Don't you think the expression of birds matches so well with the sentiment? 

Thank you for being here! Have a good day!


Monday, May 28, 2018

Dragonfly wishes

I am sharing two cards which I made using the stamp sets by Crafter's Companion called Flying Dragonflies and Wishes set by Pink & Main . Both are Mini hence pocket friendly & I have showcased how easily you can create different looking cards with the same stamps. Flying dragon flies is a single red rubber stamp. I trimmed it and separated both dragonflies for the ease of stamping. Do not afraid to cut your stamps, just be careful while doing so.


For the first card, I stamped the sentiment on Tim Holtz Water color card stock  using Black archival ink and Dragonflies with coffee archival ink. I used archival inks as they are water proof. Colored each dragonfly with different shades of distress inks. I mounted the water color card panel on 4.25x5.5inches top folded card.


For the second card, I embossed the large dragon fly on Let'z craft vellum using versamark & Ranger white embossing powder. I fussy cut the fly and used green copic on the back of the wings to give little bit of color.


I used  moss green card stock for the base on which I splattered some papericious white chalk paint . I love to use chalk paints for splatters on cs as they are quite thick and opaque. I also use a small, wonky panel of gaza grey cs. Initially i stamped large wishes stamp from pink & main set in grey on this panel but after a while the stamping became invisible as i had used very light ink so I stamped it using black archival ink across the panel. I also embossed small birthday from the same set on a stripe of white cs.


So it is easy to create two totally different looking cards using the same stamps if you think and plan. While shopping for supplies, always look for the versatility of stamps, how many ways you can use it, how it goes with your existing supply etc. That way you can get the maximum worth of your money! Be smart, save some & create more...:)
Happy Crafting, gals! See you soon!


Thursday, May 24, 2018

You are SWEET

Hello friends,

Today, I am sharing a card made for Jane's Doodles blog. It was inspired by a cookery show I was watching while eating watermelon...:P . The summer is really getting worst every year where I live. Temperature is soaring  47 degree centigrade during day time. Nights are very warm too. So we eat lots of fresh fruits specially water melons to keep us hydrated as well as to avoid craving for ice cream at night!

I was watching some cookery show where the contestant made deconstructed dessert, so I combined the idea of deconstructed dessert and watermelon to make this card.


I simply die cut a panel from water color card stock and painted it using mission gold water colors. Stamped the water melon Popsicle stamp from Cool set & fussy cut just the melon part. For the border I used outline rain drop stamp from Rain Or Shine set and just filled it with black scribbled lines. I also applied wink of stella shimmer on slices of water melon which is not visible though.

Hope you like my idea! Thanks for being here. Happy crafting!


Thursday, May 17, 2018

Sunshine Wishes

Hi friends,

I am on Letzcraft blog with these two cards. One is a tri-fold card. You can check their blog HERE for the process tutorial.


I just love how all those sentiment add so much to the card.


Thank you for visiting me! Keep crafting! Hugs!


Saturday, May 5, 2018

Better late than never : A belated birthday card

Hello friend ,

I made this card for Jane's Blog.


I used MFT die to cut the window from a pattern paper from PTI. I think the die's stitched detail and black out lines on panel goes well together.  Ink blended the backdrop with oxides and stamped some grass. Stamped sentiment before mounting panel using foam tape. Turtle, cake and party hat is colored with copics. Here is the closeup.


Hope you like it! Thanks & Hugs!


Friday, May 4, 2018

Altenew Daisy mini stamp set

He there,
I am on Letz Craft blog with 2 cards and a tag using Altenew Daisy stamp set. Please visit
HERE to learn the process.


Thanks for being here. Have a wonderful day!


Monday, January 29, 2018

Love Notes Valentine Kit

Hi Friends,

Last week I received this Love Notes Valentine Kit  by Dadarkar Arts. And I was awe stuck ! It is a humongous...:O  and very thoughtfully put together kit. It has plenty of really good quality double sided pattern papers, sticker sheet, stamp sets, inks, card stock and much more. You can check the things included in it on their site.   There are so many things you can do with it. But unfortunately i got it too late so i couldn't make everything I wanted to.

I am sharing all the projects I manged to make and ideas of what else I wanted to make. I tried to use all the supply from the kit only except dies.

I will start with the cards.


I have used Art Impression stamp, colored with copics, matted with pattern paper and mounted on red cs from the kit.


This one was very quick to put together. I cut one of the printed card from pattern paper and made a shaker card using shaker mix from the kit.


I just love the color of this cs. I die cut a heart from a printed pattern and mounted it with 3d tape on slightly misted with clear shimmer card base. Embossed sentiment in white and created line texture using score board.  There are 2 sheets of these speech bubble pattern with lots of valentine related words and images. I fussy cut one of them and mounted on red speech bubble die cut. Used button and bling to embellish the card.


Here, I have used image from Art Impression and sentiment from Hampton Art stamp set. This is the perfect example how you can mix and match the supply from kit....possibilities are endless. I could have made many more cards but wanted to try something different. 


Next project is a mini book with 8 tags and pockets created using single sheet of 12x12 pattern paper. Totally out of my comfort zone but I love to challenge myself plus it is a perfect project to showcase this beautiful, double sided paper. 
The book measures 3x4 inches and has 8 pockets and tags (2.5 x 3.5 inches).


for the focal point, I have used one of the sticker matted with golden mirror cs.


I also stamped each tag with Versacolor inks from the kit. To make it little more interesting I used 'Heart' shape insted of word 'Love' .  Honestly, I love love love this. It looks so cute and has enough space to write tons of messages and tiny pictures.

The last project/s are just adorable and literally out of the box. I made 6 match box cards.... ha...ha are you shocked? Yes, i did and they are adorable. 


Don't you love them? 
I used speech bubbles and sticker sheets for sentiments. Deciding on outside sentiments and inside elements was the toughest part as I wanted a kind of continuation form outside to inside. They measure 2.75" x 2.2 "

 U is a die cut .


Fill it with small candies.


These make cute valentines for kids too!

Other things which can be made using this kit

- Scrapbook/lay out
- Shaker jar tags
- explosion boxes
- pop up box card would be great
- Mini 3x3 inches note card with envelope (card can have any sticker as focal point and tiny envelopes will look cute with these double sided papers)

There are endless possibilities with this generous kit. I hope I inspired you to give the kit a try.  Please feel free to ask if you have any queries. Thank you so much for being here. Have a great day!