Pages

Tuesday, January 30, 2018

I love you this much

Hey there,

I am here with a cute card I made for Jane's Doodles blog! I love this Seamus stamp set by her which is on sale right now!


I just bend the sentiment stamp while sticking on acrylic block so it can make a little banner shape. The back drop of clouds is from Love stamp set which is retiring soon!
I hope you like my card! Thank you for being here.


Monday, January 29, 2018

Love Notes Valentine Kit

Hi Friends,

Last week I received this Love Notes Valentine Kit  by Dadarkar Arts. And I was awe stuck ! It is a humongous...:O  and very thoughtfully put together kit. It has plenty of really good quality double sided pattern papers, sticker sheet, stamp sets, inks, card stock and much more. You can check the things included in it on their site.   There are so many things you can do with it. But unfortunately i got it too late so i couldn't make everything I wanted to.

I am sharing all the projects I manged to make and ideas of what else I wanted to make. I tried to use all the supply from the kit only except dies.

I will start with the cards.


I have used Art Impression stamp, colored with copics, matted with pattern paper and mounted on red cs from the kit.


This one was very quick to put together. I cut one of the printed card from pattern paper and made a shaker card using shaker mix from the kit.


I just love the color of this cs. I die cut a heart from a printed pattern and mounted it with 3d tape on slightly misted with clear shimmer card base. Embossed sentiment in white and created line texture using score board.  There are 2 sheets of these speech bubble pattern with lots of valentine related words and images. I fussy cut one of them and mounted on red speech bubble die cut. Used button and bling to embellish the card.


Here, I have used image from Art Impression and sentiment from Hampton Art stamp set. This is the perfect example how you can mix and match the supply from kit....possibilities are endless. I could have made many more cards but wanted to try something different. 


Next project is a mini book with 8 tags and pockets created using single sheet of 12x12 pattern paper. Totally out of my comfort zone but I love to challenge myself plus it is a perfect project to showcase this beautiful, double sided paper. 
The book measures 3x4 inches and has 8 pockets and tags (2.5 x 3.5 inches).


for the focal point, I have used one of the sticker matted with golden mirror cs.


I also stamped each tag with Versacolor inks from the kit. To make it little more interesting I used 'Heart' shape insted of word 'Love' .  Honestly, I love love love this. It looks so cute and has enough space to write tons of messages and tiny pictures.

The last project/s are just adorable and literally out of the box. I made 6 match box cards.... ha...ha are you shocked? Yes, i did and they are adorable. 


Don't you love them? 
I used speech bubbles and sticker sheets for sentiments. Deciding on outside sentiments and inside elements was the toughest part as I wanted a kind of continuation form outside to inside. They measure 2.75" x 2.2 "

 U is a die cut .


Fill it with small candies.


These make cute valentines for kids too!

Other things which can be made using this kit

- Scrapbook/lay out
- Shaker jar tags
- explosion boxes
- pop up box card would be great
- Mini 3x3 inches note card with envelope (card can have any sticker as focal point and tiny envelopes will look cute with these double sided papers)

There are endless possibilities with this generous kit. I hope I inspired you to give the kit a try.  Please feel free to ask if you have any queries. Thank you so much for being here. Have a great day!


Wednesday, January 24, 2018

Copics on x-press it blending paper

Hello friends,

How are you? I am here after a long time. Instagram is taking over my blog posts. Do you feel the same? All the time I remind myself to write a blog post instead of just posting on fb or insta but I come up with one or other excuse to not to do so, every-time! But not today...:)

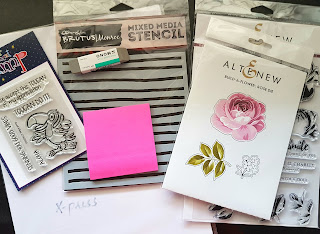
I am here to share my experience( first impression) of using x-press blending card for copics. Some time back Roopali Chawla of Allthingscraft.com  got this paper & i was excited to try. She was kind enough to send few ca along with lots of other goodies. Thank you Roopali for being so generous!


I have made a card using 'Good Vibes' stamp set by Your Next Stamp.


The Toucan is stamped on x-press card and colored with copics. It was a quick try to use it. I am sure going to work more with this paper. The inks blend beautifully on it. and it retains the texture marks well at the same time. See the blending around eye and neck while the tone on tone texture in dark grey/black part, the red to orange gradation on beak and patchy colors. 


Blending is almost effortless and the best part i loved about it is when you add light shade on dark it does not create blooms which is most common issue for me with other  card stock. And it is thinner paper so you can easily put it through the printer for digital stamp printing!
I will be back with more on this paper.

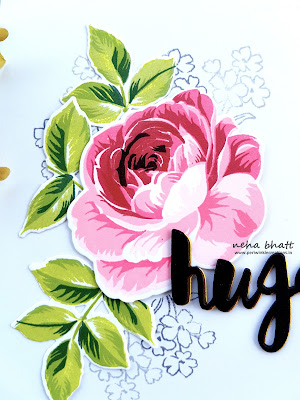
I also try to stamp on it as I wanted to use this build a flower, rose stamp by Altenew which Roopali got for me on pre-order. 


It works beautifully with this layered stamps and various inks. I have used lawn fawn, altenew & mft inks for this one. The ink stays put on card once stamped so layers are distinct and crisp.

check the sharpness in close up!


One more with the same stamp. For the rose and leaves I have used Neenah solar- 80gsm!


Roopali also sent me the full sticky post it notes for masking! I love this product and have been using for past 2 years. The best way to create mask. Check how simple it was to cut it with die and mask and stamp the small flowers.


I save the masks along with my stamp set to use it in future. 

I hope you like the post and give this paper a try! Thank you for being here! Have a great day! Hugs!


Friday, January 12, 2018

Jane's Doodles blog hop

Hello Friends,

Welcome to my blog. This is my first post for 2018 and I am starting with Jane's Doodles blog hop celebrating the release of 3 brand new stamp sets.


          Pucker up!                       Stinks!                             To the moon


My first card showcase the Pucker Up! set


I have use various distress oxide inks and MISTI to stamp all the  images on white panel which is mounted on light grey card base. Sentiment is stamped in versafine black ink.

Second card uses stinks!


This set has some really cute skunk images and some fun sentiments too like ' You are scentsational'...:P ! Though I have used sentiment from the pucker up set as it was going well with balloon theme. 

Skunks are colored with copics. I added 2 faux shaker hearts as  balloons .
check the close up.


Third card is a slider one! To the moon is my  personal favorite from this release.


The background is acrylic colors on white panel spritzed with tooth brush.  


Here is the video to see the sliding action.


Isn't that fun! Hope you like the cards and feel inspired enough to get these stamps! 


Now, before you hop onto Milka's blog, I wanted to share an awesome news with you all. From next month, coordinating dies for the stamps are being added to the store. Yaaay....no more fussy cutting right? 
Giveaway : One lucky winner from all the blogs will get one stamp set of her/his choice. Winner will be announced on Monday! Also all the stamps are 20% off through out the weekend. So start hoping and leave some love on the way!

Your next stop would be Milka !

 Following is the full blog hop order in case of broken link.


Jane 
Neha  (That's Me)
Ange 
Marion  
Kaja  
Vika  
Galina  
Norine  
 Jane's Doodles  


Thank you for being here!