Pages

Friday, July 26, 2019

Alcohol Ink Paper by HNDMD


Hello Friends,

I am back with a review post. This time, it is Alcohol InkPaper by HDMD. It is a great alternate for YUPO. Like YUPO it is a synthetic paper. Alcohol inks works best on nonporous surface. This paper is non-tearable and nonporous which allows great movement of inks. It is thick and can take hair dryer or heat gun very well. Compare to yupo it is 1/3 of the price. Isn’t that great!
There are mainly pictures of the projects i made on this paper. I will list color, brand and tips for each project below the picture.


These two are small approx 2.5 x 3.3 inches.
Colors  : Copic refills YG63 and G19
Gold  - Piñata gold applied with thin brush.
Tips – Use hairdryer to get those lines. The paper is quite thick and will take heat well without warping.


Same colors as above but I used this fan brush to create texture on this one.

I have used Piñata gold along with the inks and isopropyl alcohol.


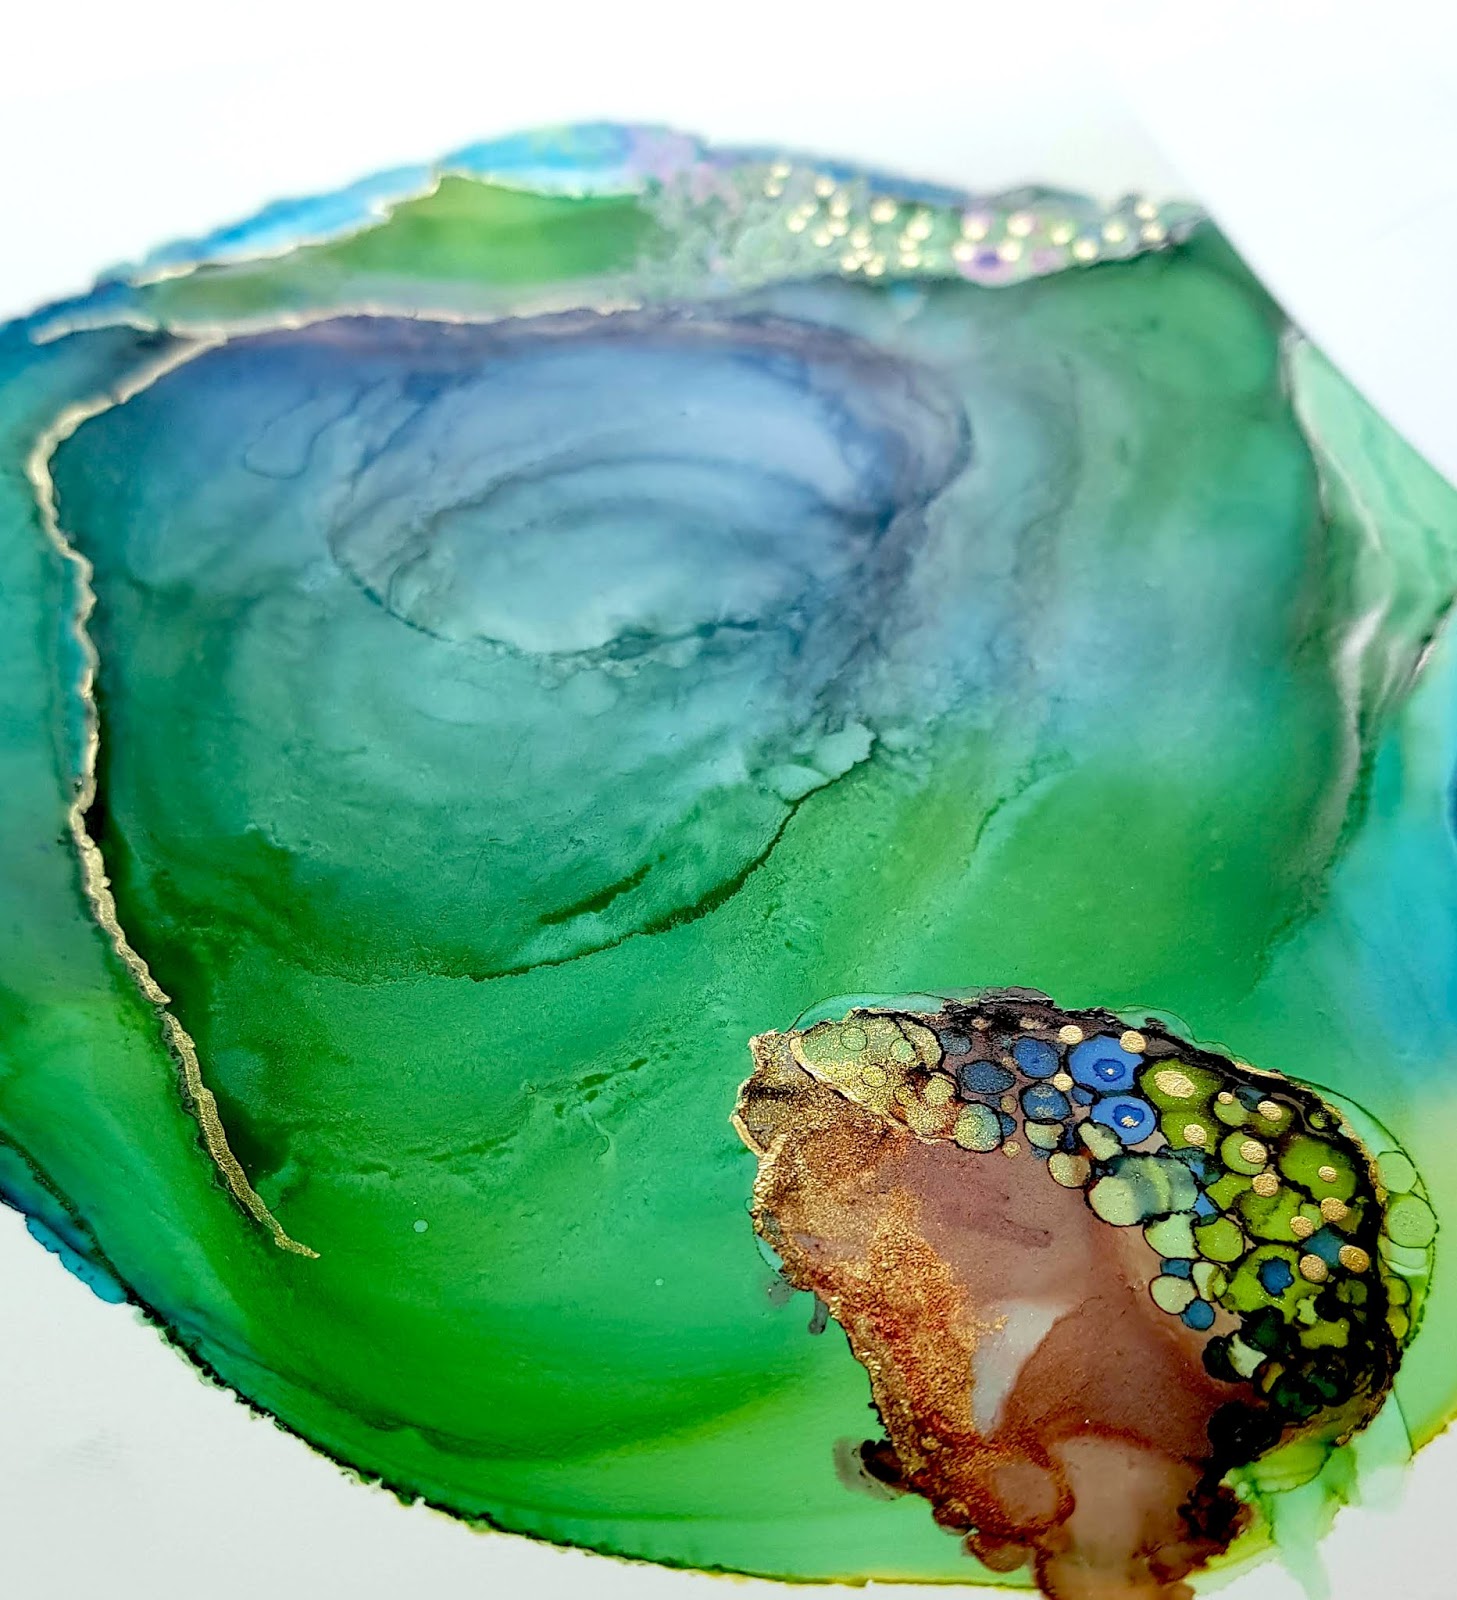
I would like to call this ‘In the Womb’...:)

Colors : Copic YG63, G19, Ranger- Sailboat blue, piñata-passion purple.
I was going for an infinite ring look for this one but because of humidity in the air, inks won’t co-operate. Yes, alcohol inks work best in dry cool weather.
Check the close ups.


Next one uses the same colors as above but totally different composition.


Tips : use blow dryer to move inks and thin straw for the patches of texture.
Details...


Next is everybody’s favorite ---floral!


Colors : For the background – Copic BG23, Ranger –Turquoise
               For Flower – Ranger – Flamingo, Raspberry
               Steam – Ranger citrus, copic G19


Tip – I use this tiny pallet of medicine strip. Details in the stem is added with that micro brush. Petals are blown with thin straw.


Next one is created using HNDMD masking paper! I have tried many different materials from washi tape to masking paper & tape with alcohol inks but was never successful. Inks always bleed under the mask. But this masking paper is a game changer... no bleeding under the edges. The alcohol ink paper is easy to clean too. Few inks stain the paper but overall you can clean splatters and booboos with a swab of isopropyl alcohol without leaving any trace.


I die cut a butterfly from the masking paper and used the negative to mask alcohol ink paper. Added inks, removed the mask and added few splatters.
Colors – Ranger – Purple twilight & Cool Peri
There are many possibilities with masking. I will try to explore more in my next post.


For this landscape I used Ranger – Turquoise for sky, Caramel, silver metallic and pitch black and also Piñata – gold!


Last one uses only one color!


Color – Ranger Raspberry
Tip – Dilute ink with isopropyl before adding to the paper. This will prevent staining of paper. Use hair dryer to blow the ink back and forth to create crease lines. 


Highlights :
-        Great quality of paper. Ink moves beautifully on it.
-        Because of thickness, you can use hair dryer fearlessly. I tried heat gun too from a distance and it was safe and didn’t wrap the paper.
-        Paper does not stain easily, and clean up is very easy.
-        PRICE – 1/3 than yupo....I am SOLD...:)  

I hope you like the projects. Give these paper a try. I am sure you will fall in love with it. Thank you for being here. Have a great day!


Saturday, July 13, 2019

Pinkfresh Studio - Guest post

Hi friends,

I am super thrilled to be on Pinkfresh Studio blog as their July guest designer. I have made few cards, tags and a tea light luminary!


First two cards focus on folk hummingbird stamp set.


I stamped the floral branch 3 times and embossed in silver. I colored them with copics and die cut them using co-ordinating die.


 I used Fancy Floral2 die from my stash to cut a white panel which was mounted on a white card base. This adds texture and interest to the background. I cut up floral diecuts in few pieces for the ease of arranging them nicely. 


The sentiment is cut from a glitter cardstock with Classic Words Die . Lots of white, dashes of color, little silver and golden glitter give lots of elegance to this cad. This will make a perfect wedding card, I think!

For second card, I emphasized on that beautiful hummingbird! 


I stamped and colored images with copics. I die cut the bird with matching die and floral in a circle.  I took a grey panel and added some die cut texture using one of the elements from Classic Tags Die Set. I mounted the panel on a white card base with liquid glue and used glue dots to adhere other elements. Few enamel dots and it is done. 

Check out the colors on that humming bird!


For next two cards, I have used Lost in the City stamp and co-ordinating die.


I love this stamp set. I decided to do little surgery with the die cut to give it a different look. I stamped, water colored and diecut a panel. I carefully cut out few buildings with a paper cutter and a metal ruler. I used 3d foam dots to mount the die cut panel on a ink blended back ground panel to give a little dimension to the scene. 


Just for fun, I even backed the windows with clear acetate and light beige card stock. Can you see it? It actually looks like window glass.


Second card has 2 layers of embossed cityscape.  Check it out.


For first layer, I stamped the buildings on a beige panel with versamark and embossed in gold. I also added few touches of color with tombow markers. Second layer was made by stamping, white embossing and die cutting a blue card stock. I selectively cut out few buildings and mounted the blue panel on beige with help of foam dots. 


Next are 2 tags made with Classic Tags with Fillable Elements Die Set  and Indigo Hills pattern paper. 


This die set is so versatile! You can use just tag dies, just fillable elements (the way I used it in second card), and combine both together for numerous possibilities.

I used tag dies to cut the pattern paper and grey and yellow card stock. I added diecut borders on both the tags with fillable elements so the under layer can pick trough it. 


The last one was a last minute thought and made just for fun! It is a tea light luminary.
I took a 12”x 4 inch cardstock, scored at 3,6 and 9 inches. Use the fillable element from the tag die set to cut all 4 sides. The die is very detailed but it is deeply etched so it cut every detail in one go without shim. It is truly impressive!


I blended blue print sketch distress oxide for double tone look. Line up the cut sides with vellum, join both the ends with a thin strip of cardstock from inside and your instant decoration is ready.


That is all for now! I hope you like the projects I made. Thank you,  Pinkfresh and Lea for the wonderful opportunity.

Hugs!